Benefits of an Inventory Search: Inventory tracks all listings by your MLS ID (even if you have worked in different offices), across all classes. You can find every listing where you represented the seller AND all of the Sold listings where you represented the buyer.
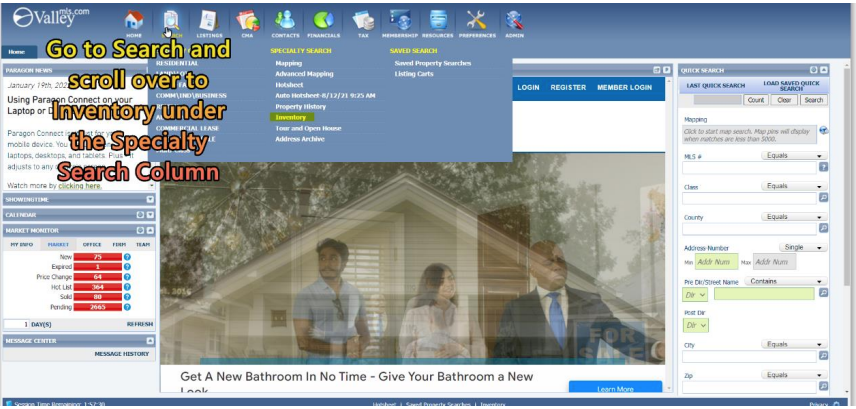
Step 1: Go to Search, scroll over “Specialty Search” and click on Inventory
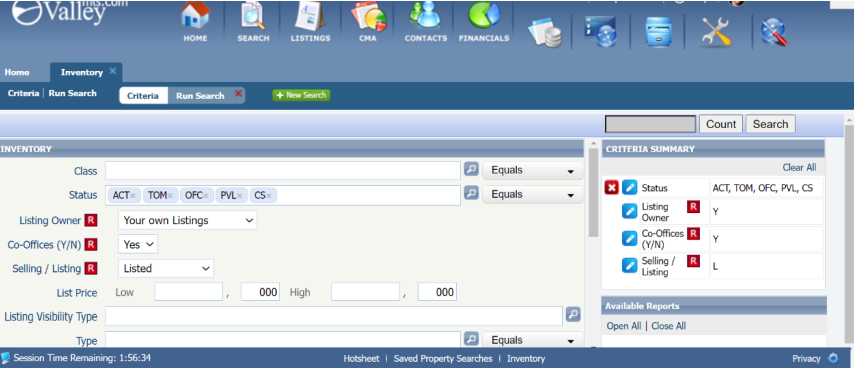
Step 2: Your Inventory Search Screen will automatically default to your Active status listings.
Status: Coming Soon, Active, Contingent, Pending, Expired, Sold (You can also include Office Exc)
Listing Owner:
As an Agent: you will only have the option to see your own listings.
As a Qualifying Broker: You have the options of seeing your own inventory, or inventory for your office. You can also select an agent in your office, to view individual agent production.
Selling/Listing:
You can select to view only listings where you were the listing agent.
View listings where you represented the buyer
OR you can view listings where you were the listing agent OR the selling agent
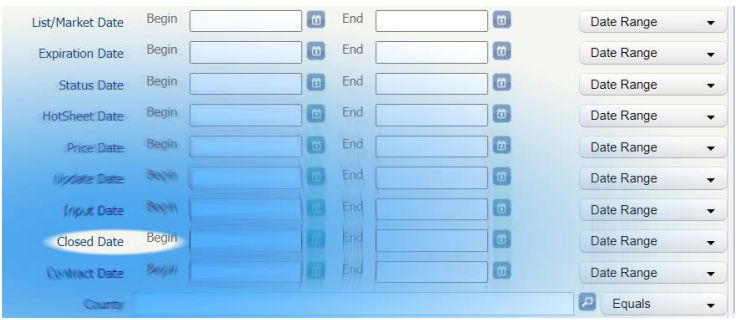
If you want to limit your results to only see, for example, your closed transactions for the past year, you would enter only a status of SOLD, select “Listed or Sold,” and then put the applicable date ranges in the CLOSED DATE field.
Once you’ve entered your search criteria, click on search to see your results!
CUSTOMIZING YOUR SEARCH RESULTS SPREADSHEET
Scenario:
Going Past the Projected Closing Date is a VERY common MLS violation. But, did you know that you can track the projected closing date in your INVENTORY?
In this section we will explain how you can search for all of your CONTINGENT/PENDING listings in your inventory and then sort them by the projected closing date.
From the Inventory Search criteria screen, search by STATUS = CNT, PND. Hit Search to bring up your results in a spreadsheet view.
To customize the default inventory report, click on CUSTOMIZE.
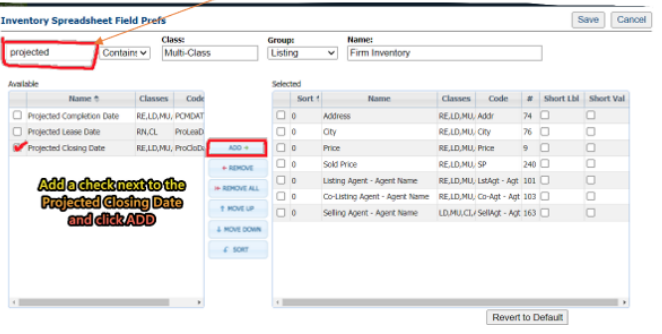
You will now be able to use the SEARCH field to find the field you want to add to your report.
Once you’ve located the field name, add a check mark in the box to the left of the field and then click
ADD. (Once added, you can drag and drop these fields into whatever order you like.)
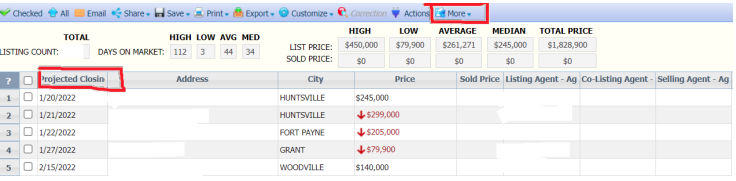
The results screen below shows that the first column (Projected Closing Date) has been customized and
added to this INVENTORY view report.
Now, imagine you’ve got 5 listings that are currently under contract and you are viewing them in INVENTORY.
If you’ve added the Projected Closing Date to your report, you can sort the listings by clicking on the “Projected Closing Date” Column Header to see if there are any that you need to maintain.
If so, simply put a check mark (to the left of the listing) and select MORE.
Clicking MORE and MAINTAIN LISTING will take you directly to Listing Maintenance screen with your MLS #s already filled in and ready to edit.
As always, feel free to reach out to the MLS Department, mlssupport@valleymls.com if you have any
questions or need assistance!